EN
EN

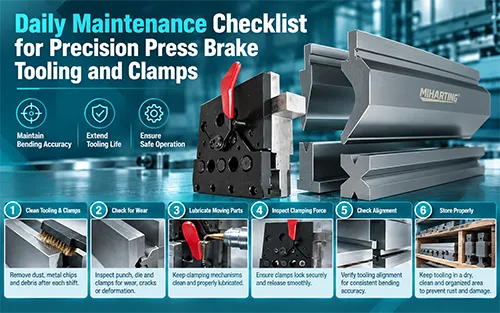
Precision tooling cannot maintain accurate bends if dirt, rust, wear, or loose components are ignored. A simple daily checklist helps you protect your tooling, clamps, bending accuracy, and production stability.
You should clean press brake tooling and clamping surfaces before and after every production shift. Check for rust, damage, loose fasteners, and abnormal clamping before starting the next job. Record any problem early, so you can correct it before it causes inaccurate parts or tooling damage.
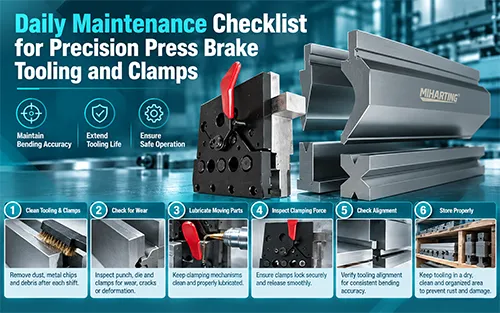
You do not need a complicated maintenance program for daily inspections. Most checks can be completed quickly before production and after the final job.
Use this checklist as a practical starting point for your operators and maintenance team.
Check Item | What You Should Do | When | Status |
Punch Surface | Remove oil, dust, and metal particles | Daily | ☐ |
Punch Tip | Check dents, wear, and deformation | Daily | ☐ |
Die Surface | Clean dirt and metal particles | Daily | ☐ |
V Opening | Check damage and foreign material | Daily | ☐ |
Tool Interface | Clean tang and locating surfaces | Daily | ☐ |
Segmented Tools | Check joints and damaged sections | Daily | ☐ |
Upper Clamp | Check seating and visible damage | Daily | ☐ |
Lower Holder | Check cleanliness and positioning | Daily | ☐ |
Fasteners | Check for visible looseness | Daily | ☐ |
Hydraulic/Pneumatic Clamp | Check leaks and abnormal operation | Daily | ☐ |
Rust Protection | Apply protection when required | After Shift | ☐ |
Tool Storage | Return tools to correct positions | After Shift | ☐ |
Maintenance Record | Record abnormal conditions | After Shift | ☐ |
You can print this table and place it near each press brake. Operators can complete it before starting production.
You should begin every shift with clean punches and dies. Small metal particles can remain on the tool after the previous production job.
Clean the punch tip, die shoulders, V opening, tang, and locating surfaces. Use a clean cloth and an appropriate cleaner recommended for your tooling and workplace.
Do not ignore the clamping contact surfaces. Contamination between the tool and holder can prevent correct seating and affect repeatability.
Small metal particles often collect inside the V opening and around the die shoulders. They can come from scale, burrs, coatings, or previous workpieces.
You should remove these particles before loading a new workpiece. Hard particles trapped between the sheet and die can damage both the tooling and finished surface.
This check becomes especially important when you bend stainless steel, aluminum, painted sheet, or decorative panels.
Cleaning gives you a good opportunity to inspect the actual working surfaces. Look carefully at the punch radius and both shoulders of the V die.
You should look for dents, chips, unusual wear, deformation, and scratches. Compare segmented sections if one area appears different from the others.
Do not continue production when you find serious damage. A damaged section can produce different results even when your CNC program remains unchanged.
Precision tooling depends on more than the punch tip and V opening. The interface between the tooling and clamping system is also critical.
You should keep the punch tang and locating surfaces clean. Check the lower die interface and die holder using the same process.
Dirt or physical damage at these contact points can prevent proper seating. This may affect tool alignment and bending consistency.
Segmented tooling gives you flexibility, but each section should remain in good condition. One damaged segment can affect an otherwise accurate tooling setup.
You should inspect the contact surfaces and working profiles before combining multiple segments. Make sure each section seats correctly beside the next one.
If one segment repeatedly produces a different bend result, isolate it for inspection. Do not compensate for damaged tooling only by changing the CNC program.
Your press brake clamps hold the tooling in position during bending. Their condition directly affects safe retention and repeatable positioning.
You should inspect the upper clamps, lower holders, locating components, and visible fasteners. Look for damage, contamination, abnormal movement, or components that appear loose.
For quick clamping systems, confirm that every clamping section engages correctly. Do not start production when a tool is not fully seated or retained.
Hydraulic and pneumatic clamps require additional daily checks. You should inspect visible hoses, fittings, connections, and clamping units for leakage.
Operate the clamping system and watch for delayed, uneven, or abnormal movement. A clamp that behaves differently from adjacent units should be investigated before production.
You should also follow the pressure requirements specified by the machine or clamping-system manufacturer. Do not increase pressure simply to compensate for a mechanical problem.
Vibration and repeated production cycles can affect fasteners over time. You should visually inspect accessible clamp and holder fasteners during routine maintenance.
If a fastener requires torque verification, use a calibrated torque wrench. Tighten it only to the value specified by the machine, clamp, or component manufacturer.
Do not use one universal torque value for every press brake clamp. Bolt size, grade, lubrication, thread condition, and clamp design can require different values.
This point is important for your checklist. The operator should record “Torque Checked to Manufacturer Specification” rather than guessing a torque value.
Rust can damage precision-ground tooling surfaces and locating interfaces. You should pay special attention when your workshop has high humidity or long storage periods.
After cleaning, dry the tooling completely. Apply a suitable thin corrosion-protection product when required by your tooling maintenance procedure.
Avoid leaving wet tooling inside cabinets or directly on workshop floors. Moisture trapped around precision surfaces can cause corrosion during storage.
Good maintenance continues after the press brake stops running. You should return punches and dies to dedicated racks, cabinets, or protected storage positions.
Avoid stacking precision tools directly against each other. Tool tips, shoulders, and locating surfaces can be damaged during handling.
Organize tooling by profile, length, radius, or machine system. Clear identification also reduces setup time when your operator prepares the next job.
Maintenance problems sometimes appear first in the finished part. You should investigate unexpected angle changes instead of immediately changing the bending program.
For example, one local angle error may indicate damaged or contaminated tooling. A left-to-right difference may require checking alignment, tooling seating, or the machine itself.
If the entire part changes consistently, material variation or machine settings may also be responsible. Tooling maintenance is important, but it is not the cause of every bending error.
A simple maintenance record can help you identify recurring problems. You do not need a complicated maintenance system.
Record the date, machine, tooling ID, problem, inspection result, and corrective action. You can also photograph unusual wear or damage.
This information becomes valuable when the same tooling produces problems again. It also helps different operators understand the tooling's maintenance history.
Before starting your press brake, you can use this shorter operator checklist:
Before Production | Check |
Punch and die are clean | ☐ |
V opening is free from particles | ☐ |
Punch tip has no visible damage | ☐ |
Die shoulders are in good condition | ☐ |
Tooling interface is clean | ☐ |
Segments are correctly positioned | ☐ |
Clamps operate normally | ☐ |
No visible hydraulic or pneumatic leaks | ☐ |
Required fasteners show no looseness | ☐ |
Tooling is fully seated and retained | ☐ |
If any item fails, you should correct the problem before normal production begins.
Your end-of-shift inspection should focus on cleaning, corrosion prevention, damage detection, and storage.
After Production | Check |
Remove metal particles | ☐ |
Clean punch and die surfaces | ☐ |
Inspect working edges | ☐ |
Inspect tooling interfaces | ☐ |
Dry tooling completely | ☐ |
Apply rust protection if required | ☐ |
Return tools to designated storage | ☐ |
Separate damaged tooling | ☐ |
Record abnormal wear or damage | ☐ |
Prepare required tooling for next shift | ☐ |
This routine makes the next shift easier and prevents damaged tooling from returning to production unnoticed.
Not every inspection needs to be completed every day. You can separate your maintenance plan by frequency.
Frequency | Recommended Tasks |
Daily | Cleaning, visual damage inspection, clamp operation, leak check, rust check |
Weekly | Detailed fastener inspection, segmented tooling check, holder inspection |
Monthly | Torque verification where specified, wear comparison, clamp condition review |
Periodic | Accuracy inspection, tooling measurement, system service according to manufacturer requirements |
The exact interval depends on production volume and working conditions. Heavy-duty or multi-shift production may require more frequent inspection.
You should remove tooling from service when you find cracks, severe deformation, damaged retention features, or serious interface damage. Do not continue using a questionable tool simply because production is urgent.
Unusual wear around the punch tip or die shoulders also deserves investigation. Measure the tool when visual inspection cannot determine whether it remains within your accepted tolerance.
Mark damaged tooling clearly and separate it from normal storage. This prevents another operator from installing it during the next shift.
Need a replacement tool or clamp? Send us your press brake model, tooling interface, punch and die drawings or photos, required lengths, and material thickness. We can help check compatibility before you order.
One common mistake is cleaning only the visible bending surfaces. You should also clean the tang, holder, die base, and locating surfaces.
Another mistake is tightening every bolt as much as possible. Excessive torque can damage threads or components, so you should always follow the specified torque requirement.
You should also avoid using CNC compensation to hide a tooling problem. If bending accuracy suddenly changes, inspect the tooling and clamping system before changing production parameters.
Free Download: Press Brake Tooling Daily Maintenance Checklist
You should inspect and clean tooling before production and after the shift. High-volume or dirty applications may require additional cleaning between jobs.
You can use suitable corrosion protection on appropriate surfaces during storage. Avoid excessive products on working or clamping surfaces before production.
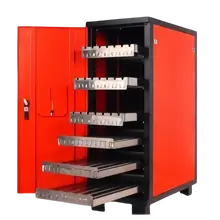
Keep tooling clean and dry, control storage humidity, and use suitable corrosion protection when required. Dedicated tooling cabinets can provide additional protection.
Follow the clamp or machine manufacturer's maintenance schedule. Use a calibrated torque wrench and the specified torque value for that exact component.
Yes. Wear, dents, contamination, and poor seating can change tooling geometry or alignment. You should inspect the tooling when bending results become inconsistent.
Daily maintenance protects your press brake tooling and clamps before small problems become expensive production errors. If you need replacement tooling, quick clamps, or compatibility support, send Miharting your machine model and tooling details for a suitable solution.
 What Are the Differences in the Demand for Bending Machine Molds for New Energy Vehicles?June 26, 2025Compared with traditional vehicles, the demand for press brake toolings of new energy vehicles is significantly different, which is mainly reflected in the following aspects:1. Application of lightwei...view
 What Is a Proportional Valve? Definition, Function and Working PrincipleJanuary 8, 2026A proportional valve is an electrically controlled valve that continuously regulates fluid flow, pressure, or direction according to a variable command signal. Unlike a conventional on/off valve, whic...view
 China Press Brake Tooling Manufacturer vs European SuppliersSeptember 4, 2026Compare China press brake tooling manufacturers with European suppliers in quality, compatibility, customization, lead time, service and total cost.view
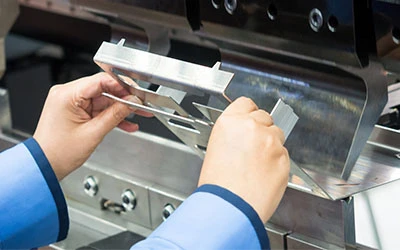 Press Brakes Don't Just Bend Metal - They Bend the RulesJuly 25, 2025The Basics and Trends of Sheet Metal Manufacturing IndustrySheet metal remains the backbone of countless industries, from automotive frames to aerospace components.view
 Retrofitting Your Old Press Brake with Modern Quick-Change Clamping SolutionsSeptember 11, 2026Upgrade an older AMADA, LVD, SAFAN or European press brake with modern quick-change clamping. Compare adapters, mechanical, pneumatic and hydraulic retrofit solutions.view
 What Special Requirements Do Titanium Alloys and Composite Materials Have for the Design of Bending Machine Molds?June 26, 2025Titanium Alloy:1. Due to the high hardness of titanium alloys, mold design needs to consider the use of specially designed structures and processes to adapt to its bending characteristics. The choice ...view